Manage Customers with the API
In Payabli, customers are the entities that buy goods and services and make payments to your paypoints (merchants). This guide explains how to manage customers with the API.
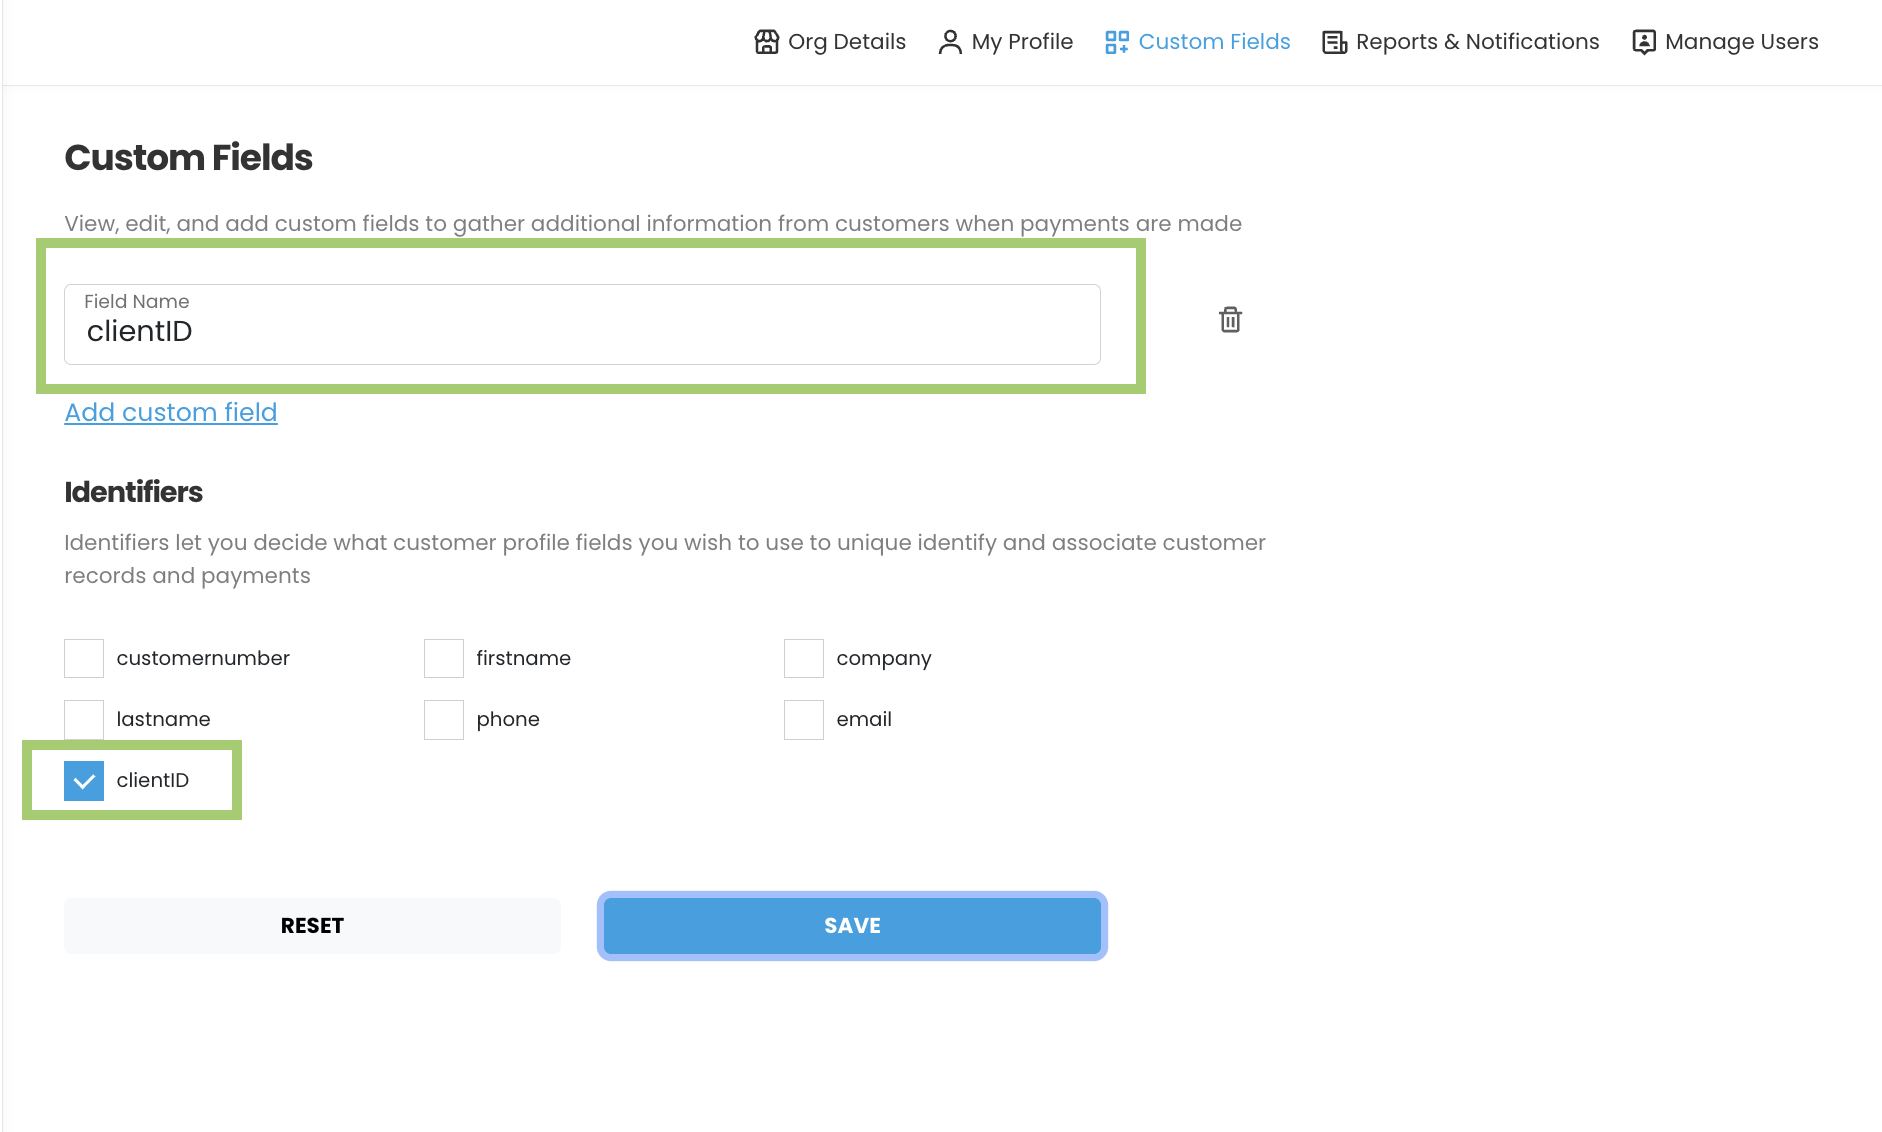
Custom identifiers
By default, when working with the API on any task that involves customer data, you must include at least one of these identifier fields:
firstnameandlastnameemailcustomerId
These tasks include things like making transactions, working with customer records, managing invoices, and more. Payabli first searches to match customer records based on your custom identifiers. If you don’t have any custom identifiers set, then Payabli falls back to matching on customerId.
Custom identifiers are managed in PartnerHub by navigating to Settings > Custom Fields.
Payabli recommends using the system-generated customerId field to identify customers for ease of integration and consistency. However, you can configure custom identifiers, which lets you decide which customer profile fields to use to uniquely identify and associate customer records and payments.
Custom identifiers cascade from org parent to child entities, so you can set them at the organization level and have them apply to all child paypoints. This is useful if you want to use a specific field across all your customers, such as email or clientId.
For example. if your company uses the customer’s email address as their unique identifier, you can choose email as the identifier. If your organization prefers to identify customers by a field called clientId, you can create that custom field in Payabli and set it as an identifier. This means that every API call that involves a customer must include the clientID because Payabli uses that field to search for customers.
Pass custom identifiers in the customerData.additionalData object like this:
Create a customer
To create a customer record, send a POST request to the /api/Customer/single/{entry} endpoint. For complete details, see the API reference for this endpoint.
The add customer request has these optional parameters:
When set to 1, an existing customer record will be overwritten with a new customer record (if the identifiers find a match). Possible values: 0 (don’t replace), 1 (replace). Default is 0.
When set to true, a new customer record will be created even if an existing customer record is found. Possible values: true or false. Default is false.
The body is where you include information about the customer, including identifiers. An identifier is required to create customer records. You can change your identifier settings in Settings > Custom Fields in PartnerHub.
When you create a new customer record, Payabli first looks for an existing customer based on matching any of your configured identifier fields. If Payabli doesn’t find a match, then it attempts to match based on the CustomerNumber field, if included. If there is no match, Payabli creates a new customer.
This example creates a customer record. It includes firstname and lastname as the minimum required identifiers, as set in the example account.
A successful request returns a JSON response. The customerId value is the Payabli-generated identifier that you can use with other endpoints to manage the customer and make transactions.
Import customers
You can import a list of customers into Payabli using the API. This is useful if you have a large number of customers to add at once, or if you want to automate the process. Before you get started, download the example CSV file and open it with the editor of your choice. Use it as an example to help you build your import file.
To import a list of customer, send a POST request to the /api/Import/customersForm/{entrypoint} endpoint, with an attached CSV file.
When importing customers, there is an optional query parameter:
replaceExisting - Flag indicating whether to replace existing customer with a new record. Possible values:
0(don’t replace)1(replace).
This example imports customerImport.csv for the entrypoint e56ce00572.
A successful request returns a JSON response with the number of added and rejected records, and any errors. The imported data is now available for use, and you can confirm by checking PartnerHub or PayHub.
responseData object contains the number of records added and rejected. The errors field contains any errors that occurred during the import process.After you import customers, you can manage them with the API. For example, you can update customer information, check customer status, and run payments for customers.
Customer status
In customer endpoints and endpoints that return customer data, the customer status field is customerStatus.
Managing customers
You can also manage customers via the API. See these endpoint references for more information: